


After logging into ESP+ and clicking on the Websites option from the main toolbar, you will be able to view your ESP+ Websites. If there are not currently any websites available in the Websites area, click on the "+ New Website" button.

A pop-up window will prompt you to type the name of the website. After entering this information, click on the Choose Template button. All available templates will be displayed and hovering on a template will provide two options: Live Preview and Select Template. Live Preview will open an example of the template in a new tab. Select Template which enables you to choose that template for your website. After you've made your selection, click on the Upload Logo button. You can click on the Choose Image to Upload button to browse your computer or drag and drop an image file to this box. After giving the website a title, selected a template, and uploaded our logo, click on the Create Website button.
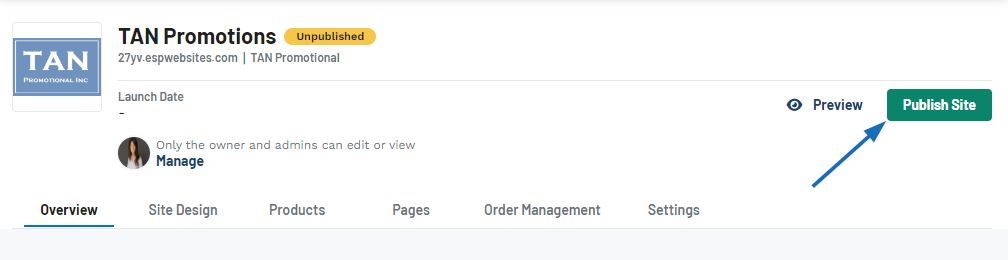
After a website is built, you will be brought into the site editor where you can customize your site. To make your site live, click on the Publish Site button.
You can now begin customizing your site by accessing the following areas in the site admin:
- Overview
View general information about the site and shortcuts to other admin areas - Site Design
Change the template and update the color palette - Products
Select the fields that will be displayed for items on your website - Pages
Add, edit, and delete pages for your website - Order Management
Manage the order process, shipping, and sales tax information - Settings
View and update the company information, SEO, domain(s), and input custom CSS
 Français
 Español