


To add and configure the modules for a standard site page (Home, About Us, and Contact) and/or any custom page, go to the Pages section and click on My Pages within the site admin.

How do I add a custom page? (click for answer)
Click on the "+ Add Custom Page" button.

A window will open where you can enter the Page Name and Slug. As you type the page name, the slug will be automatically generated based on the page name text. The slug is the URL friendly version of the page name and appears in the address bar when visitors to your site are viewing that page. It is usually all lowercase and contains only letters, numbers and hyphens. You can choose to update the slug if you like or use the one provided. When you are ready, click on the Add Page button.

In the My Pages section, all available pages for your site will be listed alphabetically. To add or update modules to the newly created page, click on the three-dot icon and then click on Edit.

When editing a page, there are two tabs: Design and SEO. Click on the Add Element button to begin adding content to the page.

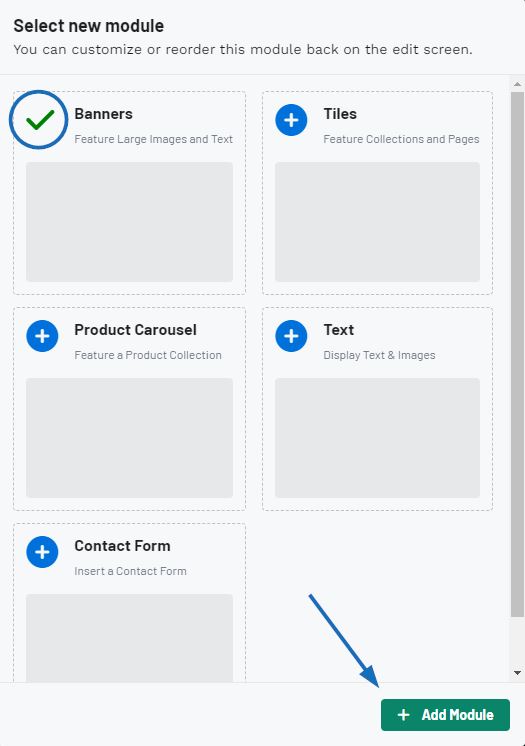
Click on the Add New Module option to select which type of module you would like to include on the page and then click on the "+ Add Module" button.
When a new module is added to a page, it will automatically be listed as the last module. To move an element, click on it and then drag and drop it to reorganize the order of the modules on the page.
There are five types of modules available:
Banner Collection
After adding a Banner Collection module to the page, use the arrow to begin creating content. To create a new banner, use the “Choose Image to Upload” button to browse your computer for the image; or drag and drop the image to the available box. Next, enter image alt text.
What is Image Alt Text? (click for answer)
Image Alt Text provides browsers with a short description of the image. This text will not be visually displayed on your site, but does serve several important purposes including:
- Can be read by screen reader software
- Can be indexed by search engines
- Displays in place of missing images
- Abides by ADA Compliance
The Header and Body Copy fields will combine to create a text box that will display in front of the banner image. To include a button with the text box, click on the Add button option. The button can be linked to another page on your website or a web address. You can use the slider to indicate if you would like the destination page to open in a new tab. If you would like to have the banner image as a standalone image, you can leave these fields blank. If you choose to use a text box/button, you can configure the appearance (dark or light background) and the overlay location (left, center, or right aligned). You can then click on the Add Another Banner to create up to three banner images that will rotate on your website. When you are finished configuring the content for the module, click on the Save Changes button.
Can I create a rotating banner collection? (click for answer)
Absolutely, you can configure up to three banners to display in a rotation on your custom page. After adding and configuring the first banner in the Banner Collection module, click on the "Add New Banner" button to begin configuring the second banner information. Then, click on the "Add New Banner" button below the second banner to add the third. When you are finished adding and configuring banners, click on the Save Changes button.
Tiles
After adding a Tiles module to the page, use the arrow to expand the section and configure up to four (4) tiles.
To create a new product, use the “Choose Image to Upload” button to browse your computer for the image; or drag and drop the image to the available box. Next, enter image alt text. Image Alt Text will not visually appear on your site, but does serve several important purposes such as:
- Will be read by screen reader software
- Can be indexed by search engines
- Displays in place of missing images
- Abides by ADA Compliance
The button link enables you to direct the tile to another page on your website or a web address. You can use the slider to open the destination page or link in a new tab. The Title will create a text box that will display in front of the product image.
You can then click on the Add Grid Item to create up to six product tiles that will be available via a carousel on your website. Product images within the grid will automatically resize when there is one, two, or three items added.
- One grid item will span the entire width of the page
- Two or three grid items will be evenly distributed across the width of the page.
- Four items will create a slideshow with arrows on the first and third grid items to enable visitors to scroll to these images
When you are finished configuring the content for the module, click on the Save Changes button.
Product Carousel
After adding a Product Carousel module to the page, use the arrow to expand the section and configure the module. Select the collection to be displayed, name the carousel and enter a button name. If you do not have a collection page available, you can click on the "+Add New Product Collection Page" in the dropdown.
When you are finished configuring the content for the module, click on the Save Changes button.
Text
After adding a Text module to the page, use the arrow to expand the section and configure the content. Type or paste the text you would like to include on the page in the “Insert text here” section. Then, use the options available on the toolbar to modify the appearance of the text. When you are finished configuring the content for the module, click on the Save Changes button.
Contact Form
After adding a Contact Form module to the page, use the arrow to customize the form. On the form, you can add a header, body text, and button text. When you are finished configuring the content for the module, click on the Save Changes button.
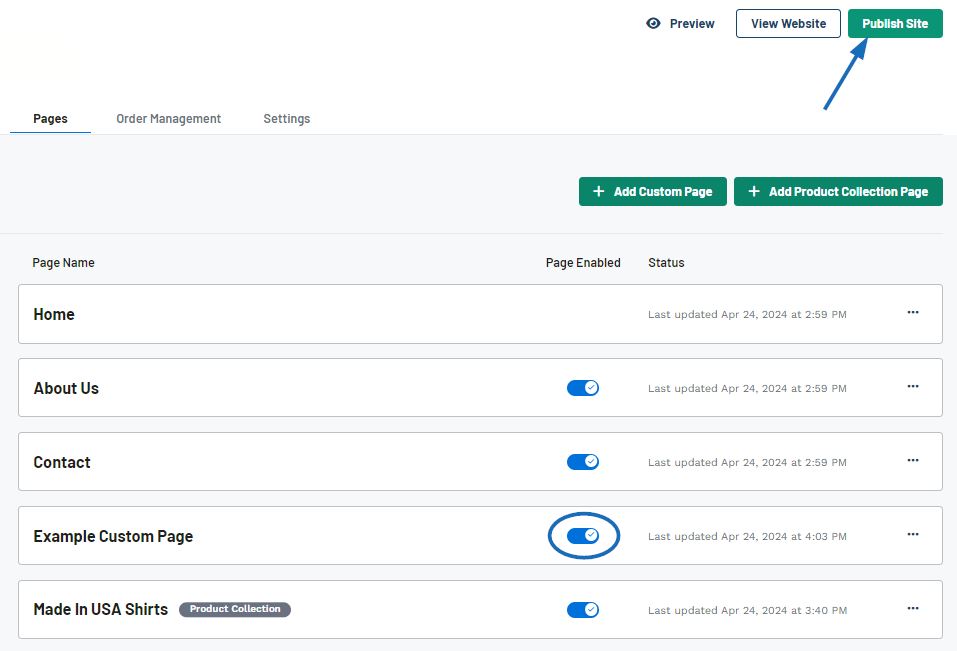
When you are finished adding and configuring modules within a page, use the slider to enable the page and then click on the Publish Site button.
 Français
 Español