


CRM enables you to import company and contact information from a file on your computer.
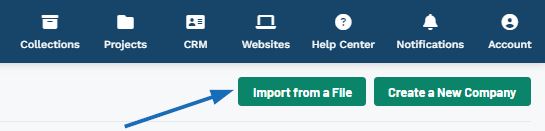
To begin the import process, expand the CRM option on the main toolbar and then click on All CRM.

In the upper right of the CRM homepage, click on the Import from a File button.
The Import from a File window will open and you can begin to configure your data. The available fields are:
- File Type
Use this dropdown to select the type of file you would like to import. Compatible file types are CSV, Outlook, Google, IIF (QuickBooks), and Vcard. It is important to note that CSV columns should have a header for each column to ensure proper mapping. - Companies/Contacts
Select which option best describes the majority of the data. - Record Owner
The Record Owner is the ESP+ User within the company who will be responsible for managing the companies and/or contacts after import. - Upload File
Use the "Choose File to upload" button to browse your computer and locate the file you would like use for import.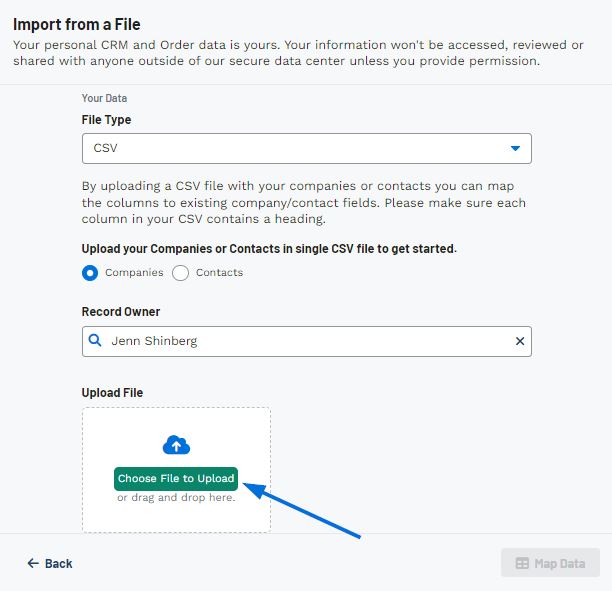
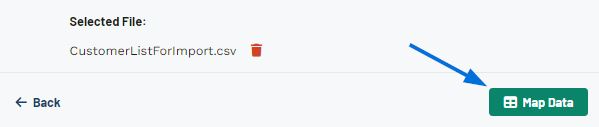
Once you have finished configuring the import options, click on the Map Data button.
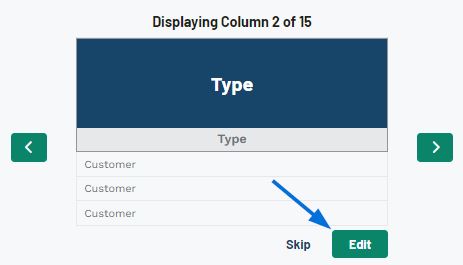
The Map Your Data page will be displayed. The data within the uploaded file will be analyzed and a predicted field will be provided for each column.
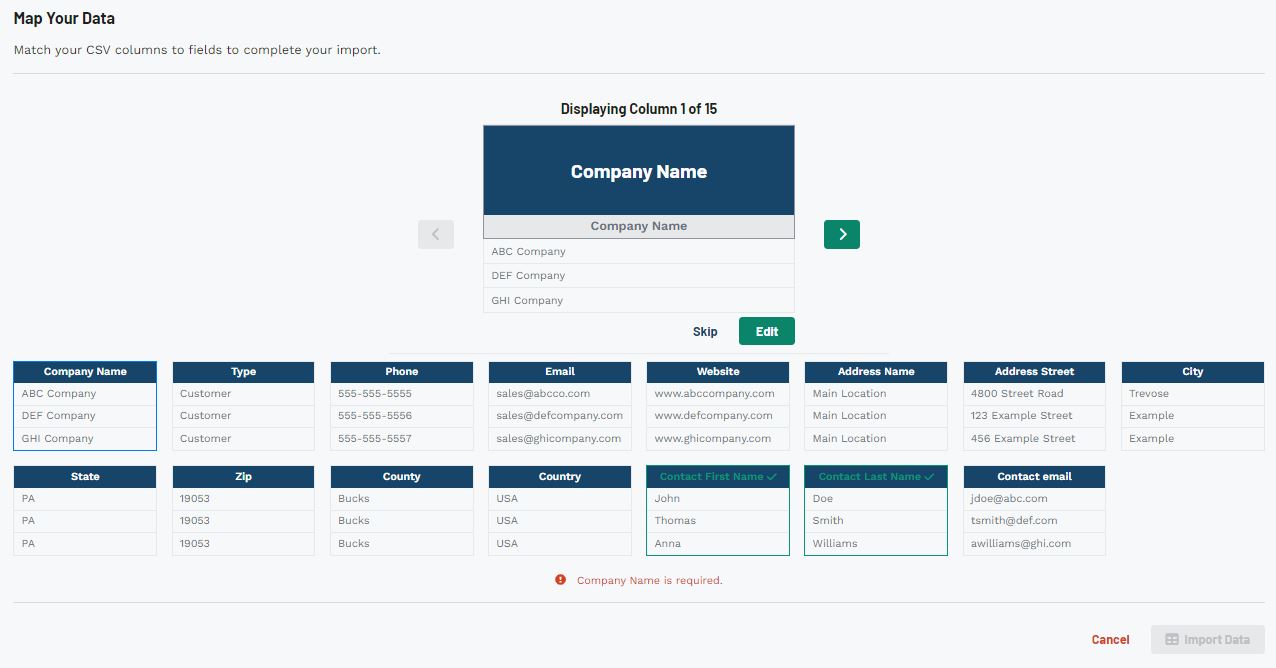
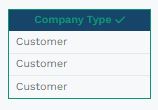
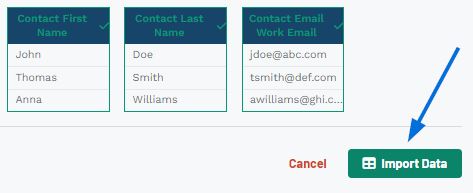
Column has green header text and checkmark
If the column header exactly matches a field, it will be displayed with green text followed by a checkmark. You are able to click on the column and use the Edit button to change the mapped destination.
Edit
The Edit button enables you to select from all of the available fields within CRM for both companies and contacts.
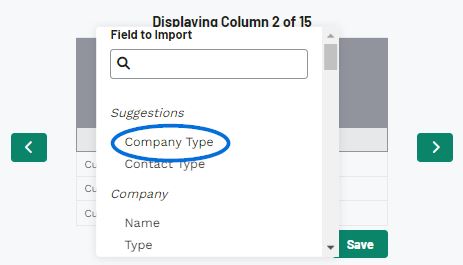
Click on the field you would like from the available options.
Click on the Save button.
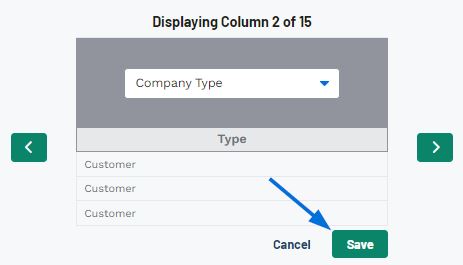
The column will now be displayed with green text followed by a checkmark.
Skip
If there is a column within the uploaded data that you do not want to include in the final import, click on the column and then click on the Skip button.
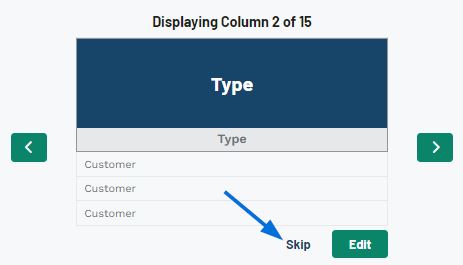
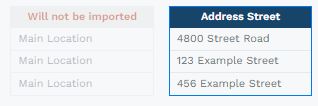
The column will now be greyed out and the header display red text that reads: "Will not be imported".
When you are finished mapping the columns, click on the Import Data button at the bottom.
Once the data has been imported, a success message will appear in the bottom right.

 Français
 Español