

After an item has been added to an order document, use the Configure Product button to update the product information, including quantities, decoration details, and additional charges.
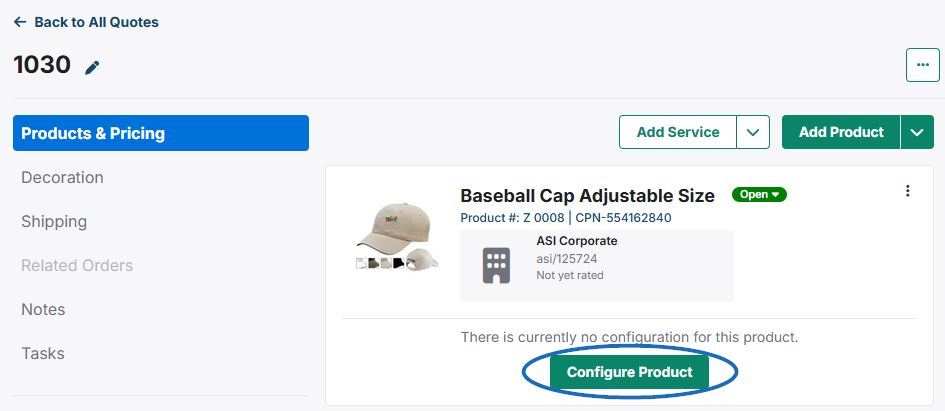
Note: If the product has been configured previously in a presentation, order document, or submitted from the customer via their portal, click on the three-dot icon and select Edit to modify the product information.
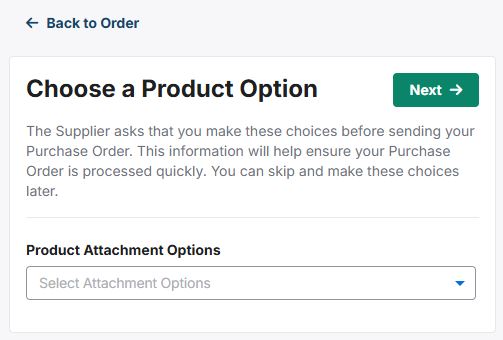
Choose a Product Option
When configuring a product, if there are multiple product options available, you will need to select the one you would
like to order. Then, click on the Next button.
Note: You will be brought directly into the Quantity
section if the item does not require product options.
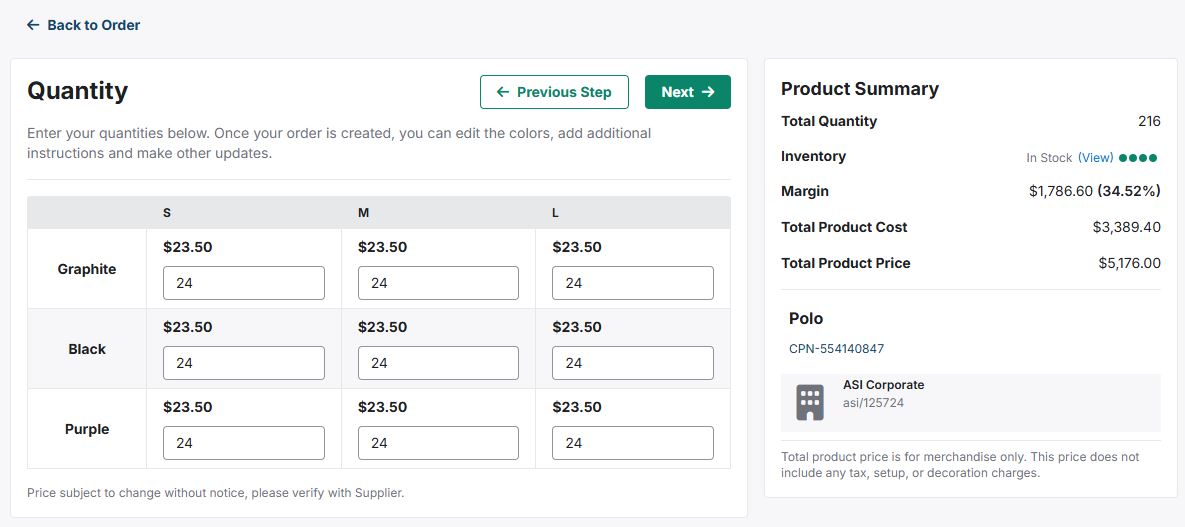
Quantity
In the Quantity section, use the available pricing grid to enter the amount for the available variants (colors, sizes, shapes, materials, etc) you would like to order. The Product Summary section on the right will update with each quantity you have entered. The Product Summary will include:
- Total Quantity: The sum of all quantities entered for all product variants.
- Inventory (if available): If the Supplier has provided live inventory information for this product, the level will be display alongside a View link that will open the full inventory information for this product.
- Margin: The amount you will earn on this transaction and the percentage difference between Total Product Cost and Total Product Price.
- Total Product Cost: The base amount that you will need to pay to the supplier for the quantity of products.
- Total Product Price: The suggested base amount (provided by the supplier) that your customer will pay for the quantity of products.
When you are ready, click on the Next button.
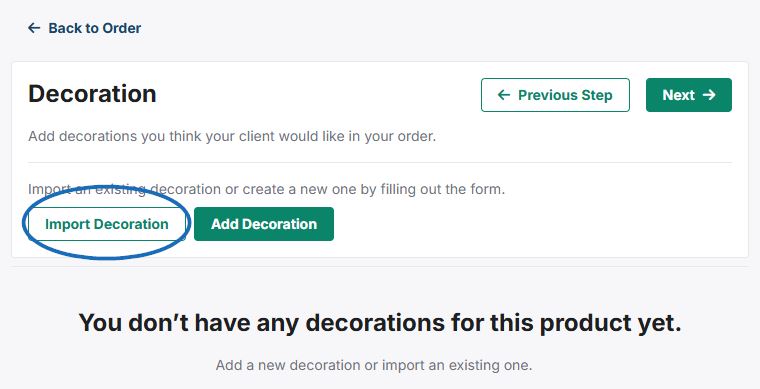
Decoration
In the Decoration Setup section, you will be able to import, add, or modify the decoration information.
- Import Decoration
If you have worked with this customer before and have a saved decoration template, you can click on the Import a Decoration button.
To apply a previously configured imprint template, use the drop-down to select the company and then click on the decoration you would like to apply. Select the decoration and then click on the Import Decoration button.
- Add Decoration
Click on the Add Decoration button to configure new decoration information. If the supplier provides imprinting for this product, the supplier's information will be automatically filled in for the Decorator field.
- Decoration Details:
Enter information for the Imprint Location, Imprint Method, Decorator (if Supplier is does not provide imprinting), and Decorator Notes.
Note: If you need to update the Decorator, the Decorator company you would like to use must be an active company within CRM.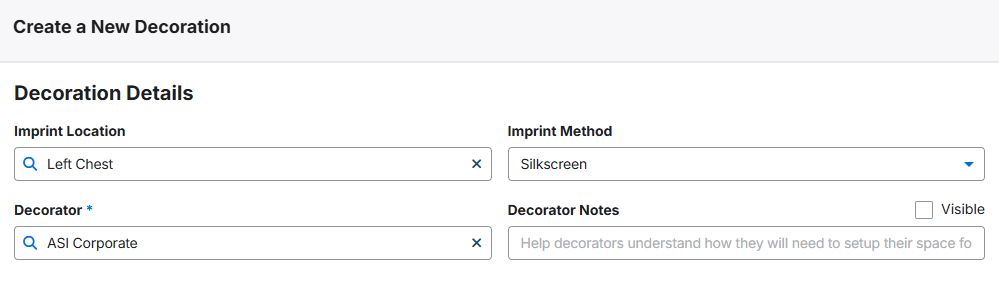
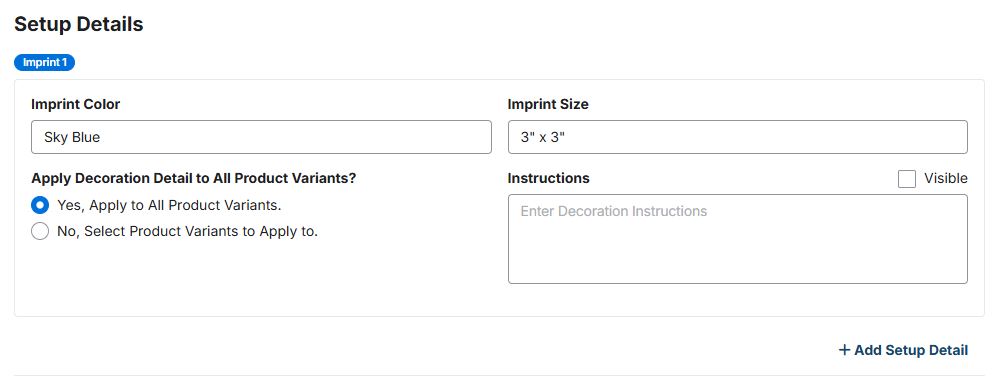
- Setup Details:
Use the Imprint Color and Imprint Size fields to indicate the color and size of the decoration. The "Apply Decoration Detail to All Product Variants?" option enables you to indicate specific decoration criteria for selected variants. For example, you are ordering T-Shirts in both black and white. A white logo on a black shirt will display well, but it would not be visible on the black shirt, so you could choose "Select Variants" to indicate that the logo should be imprinted in white on the black shirts and then click on the "+ Add Setup Detail" link to include a section imprint indicating that the logo should be imprinted in black on the white shirts. You can also include any instructions for the decoration.
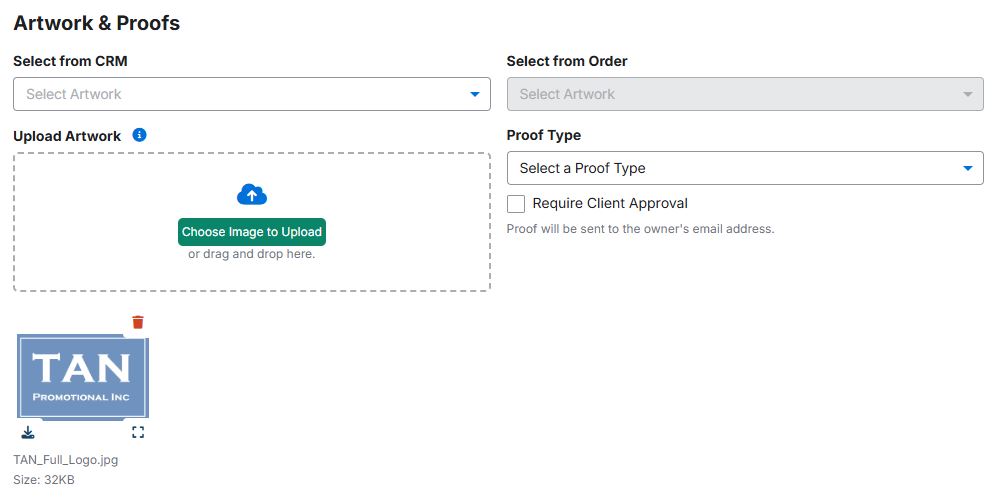
- Artwork & Proofs:
In Artwork & Proofs section, you can upload any applicable artwork files for this product. Artwork can be selected from the customer's CRM record, selected from a previous order, and/or uploaded from your computer. This section also enables you to select a proof type and indicate if client approval is required.
- Decoration Details:
After you have finished configuring the product for the order document, the product edit screen will be displayed. On this page, you will be able to modify the product information, pricing, and charges.