

To edit the product information for an order document, open it and go to the Products & Pricing area. Then, click on the three-dot icon and select Edit.
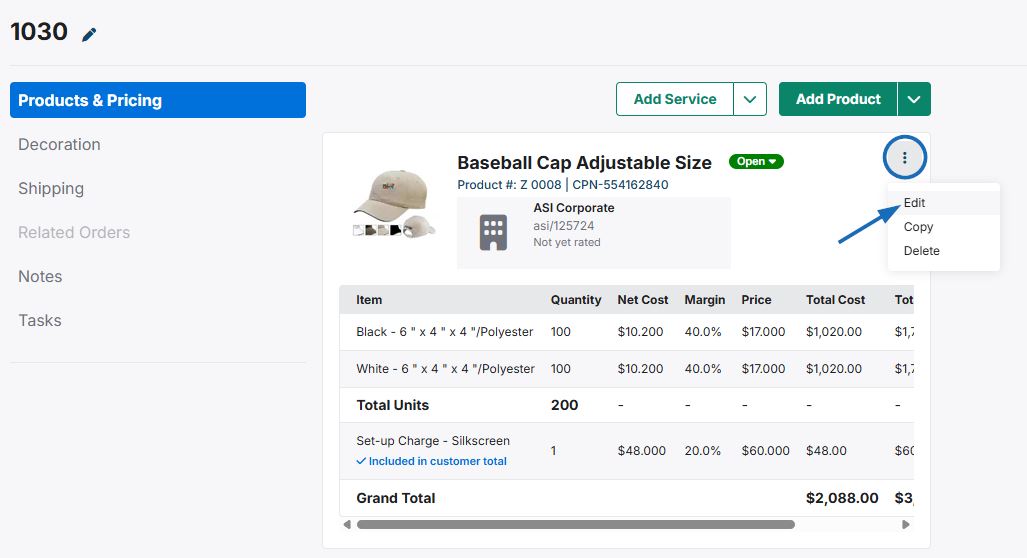
Note: If there is a Configure button below the product, click on it to enter key information. After you complete the configuration process, you will be brought directly into the editing area.
After a product has been configured, the full product editing page will be displayed. There are five tabs available:
- Configure Product
- Product Variants
- Options and Charges
- General Product Info Column
- Decoration
- Import Decoration
- Add Decoration
- Decoration Details
- Setup Details
- Artwork & Proofs
- Decoration Charges
- Shipping
- Add Shipping Destination
- Split Shipping
- Sales Tax
- Instructions
Configure Product
The Configure Product section enables you to update the pricing and general product information.
Product Variants
Product variants consists of the descriptive information about the product. Essentially, how many of each color, size, material, shape, etc. If you are updating a customer submitted quote, the quantities and product variants may be automatically filled in.
You can use the "+ Add Line Item" to pull each product variant configuration into the order document. Use the Select an item by Variant Attribute box to chose the desired line item. The selected line item will be added to the product variants list and you can then update the quantity and pricing information.
See this in action with a quote!
Each line item will contain the:
Quantity
Quantity is the amount of units. The quantities will generally correspond with price breaks given by the supplier, meaning that there is a discount for ordering more. The lowest price break is considered the minimum quantity, which means the distributor will need to order at least that many units. In some cases, suppliers will sell in quantities that are lower than the minimum for an additional charge.Net Cost
Net cost is the base price the distributor needs to pay the supplier for the product and will not be shown on any customer facing documentation.Margin
Margin is the amount the distributor is projected to earn (per unit) once all order transactions are completed.Price
Price is the suggested price for the base product provided by the supplier and is also referred to as the List Price. Distributors have full control over the List Price when creating ESP+ presentations or order documentation.
You can update line items individually by typing updated pricing and margins in the appropriate boxes. Another option for adjusting the price information for an item is to use the Adjust Charges button from the toolbar at the bottom. Clicking on this button will open the Adjust Variant Charges area where the pricing for multiple line items to be updated simultaneously.
See this in action with a quote!
You can also update the detailed information for each product variant, including the customer facing description which will display for that line item within the order document. Additionally, you can use the checkboxes to hide product variant info or the trash can to remove the variant from the order document.
See this in action with a quote!
Options and Charges
Options and Charges will display any charges that the vendor has included with the product, as well as the ability to use the "+ Add Charge" and "+ Add Run Charge" links to include custom charge information on the order document. Any product charges for the variants will be listed in the Available Vendor Charges section but will not be included on the order document unless you click on the Add link. Once a vendor charge has been added to the order document, you will be able to update the information.
Note: The charges in this section should refer to additional charges for product options, such as shipping, production time, rush service, gift boxes, etc. If you need to add decoration charges, such as a set-up charge, use the Decoration Charges section in the Decoration area.
General Product Info Column
The column on the right contains:
Product Image
To add a custom image by uploading it from your computer, click on the Upload button at the bottom of the Product Image section.Product Name
The product name provided by the supplier will be automatically filled in. You can use this field to update this information.Product Number
The product number provided by the supplier will be automatically filled in. You can use this field to update this information.Product Category
The product category cannot be altered.Customer Product Number
The Customer Product Number is a distinct call number for an item which is unique to your company that are different from the supplier's product number. A benefit to using customer product numbers is that they can only be utilized by your company. For example, if a customer tries to trace this product number via the internet or a competitor, it will not yield the correct product - even if said competitor is also using ESP. You can use this field to update this information.Product Supplier
The product supplier cannot be altered but it will not appear on the customer facing order documents.Product Description
The product description provided by the supplier will be automatically filled in. You can use this field to update this information.
When you are finished updating product information in the Configure Product section, click on the Save button at the bottom.
Decoration
The Decoration Details section enables you to configure the existing decoration details added during the product configuration process or submitted by the customer. To update the information or add a charge for an existing decoration, use the arrow to expand the decoration information. Additionally, you can import or add a decoration.
Import Decoration
If you have worked with this customer before and have a saved decoration template, you can click on the Import Decoration button.
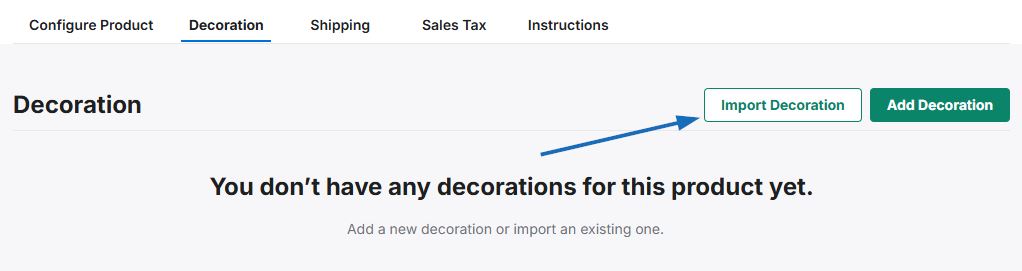
To apply a previously configured imprint template, use the drop-down to select the company and then click on the decoration you would like to apply. Select the decoration and then click on the Import Decoration button.
After the saved template has been imported, the fields can be updated.
Add Decoration
Click on the Add Decoration button to configure new decoration information.
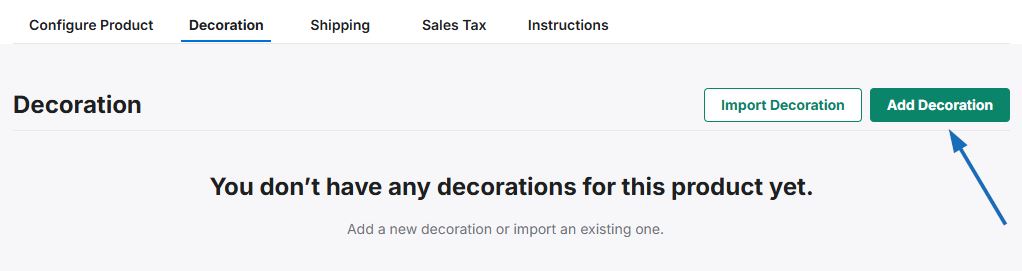
If the supplier provides imprinting for this product, the supplier's information will be automatically filled in for the Decorator field. Then, begin entering information in the available decoration fields, upload artwork, and indicate any additional charges.
There are four main sections for editing decoration information for a product:
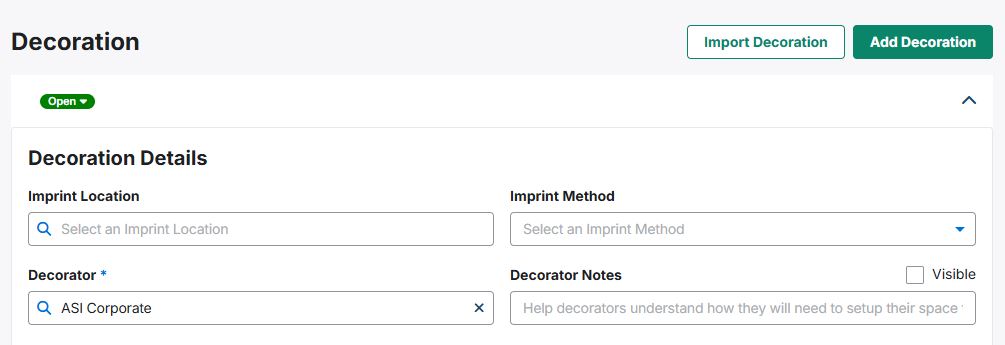
Decoration Details
The Decoration Details section enables you to enter information for the Imprint Location, Imprint Method, Decorator (if Supplier is does not provide imprinting), and Decorator Notes.
Note: If you need to update the Decorator, the Decorator company you would like to use must be an active company within CRM.
When editing the decoration information for a product, you can indicate specific decoration criteria for selected variants. For example, you are ordering T-Shirts in both black and white. A white logo on a black shirt will display well, but it would not be visible on the black shirt. Within the Decoration Details section, you can indicate that you would like the logo imprinted in white on the black shirts and imprinted in black on the white shirts.
To do this, take the following steps:
Ensure that the Product Variants section contains the correct information. For the example above, there will need to be at least one line item for black T-Shirts and one for white T-Shirts.

Go to the Decoration Details section and select Create a New Decoration.

Enter all pertinent information about the imprinting, including the Decorator, Imprint Method, and Imprint Location. Then, in the Setup Details section, enter the first color in the Imprint Color field and add any additional information, such as Imprint Size, Instructions, etc.
Below the Imprint Color field, answer the question "Apply Decoration Detail to All Product Variants?" with "No, Select Product Variants to Apply to."

Use the dropdown to select which variants (colors/sizes) which should be imprinted with the logo in the first color. For example, if the logo will be imprinted in black, select all the white shirts from the dropdown and then click on Apply.
Once the selected variants have been added, click on the "+Add Another Setup Detail" option.
Repeat the configuration process of inputting the Imprint Color and other pertinent information, such as Imprint Size and Instructions. Then, select the "No, Select Product Variants to Apply to." option in this section and select the appropriate variants for the second color.
Use the Upload Artwork section to include the image file(s) you need.
When you are finished configuring the decoration details, click on the Save Decoration button.
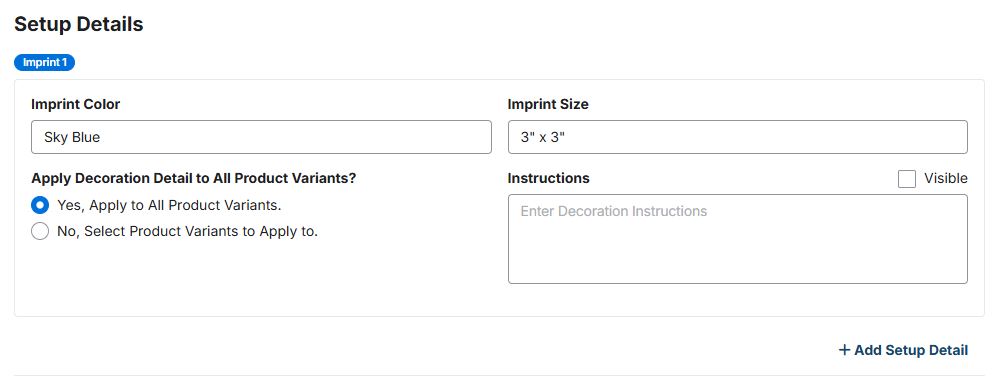
Setup Details
The Setup Details enable you to configure the imprint information for an imprint location. Use the Imprint Color and Imprint Size fields to indicate the color and size of the decoration. The "Apply Decoration Detail to All Product Variants?" option enables you to indicate specific decoration criteria for selected variants. For example, you are ordering T-Shirts in both black and white. A white logo on a black shirt will display well, but it would not be visible on the black shirt, so you could choose "Select Variants" to indicate that the logo should be imprinted in white on the black shirts and then click on the "+ Add Setup Detail" link to include a section imprint indicating that the logo should be imprinted in black on the white shirts. You can also include any instructions for the decoration.
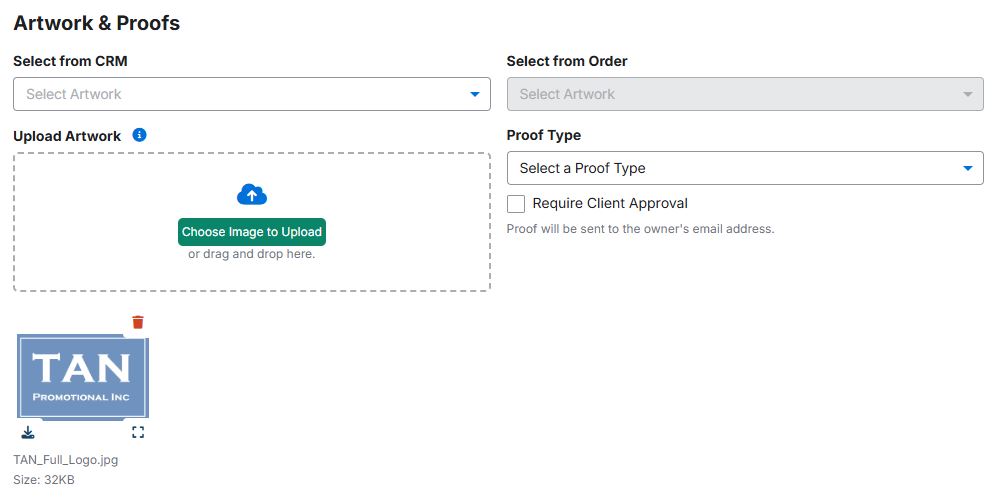
Artwork & Proofs
In the Artwork & Proofs section, you can upload any applicable artwork files for this product. Artwork can be selected from the customer's CRM record, selected from a previous order, and/or uploaded from your computer. This section also enables you to select a proof type and indicate if client approval is required.
Decoration Charges
The Decoration Charges section will display any imprinting charges that the vendor has included with the product, as well as the ability to use the "+ Add Vendor Charge", "+ Add Charge", and "+ Add Run Charge" links to include custom charge information for decoration. Any decoration charges provided by the supplier will be listed in the Available Vendor Charges section but will not be included on the order document unless you click on the Add link. Once a vendor charge has been added to the order document, you will be able to update the information.
Note: The charges in this section should refer to decoration charges, such as a set-up charge, additional color charge, tape charge, etc. If you need to add additional charges for product options, such as shipping, production time, rush service, gift boxes, etc., use the Options and Charges section of the Configure Product area.
When you are finished updating decoration information, click on the Save button at the bottom.
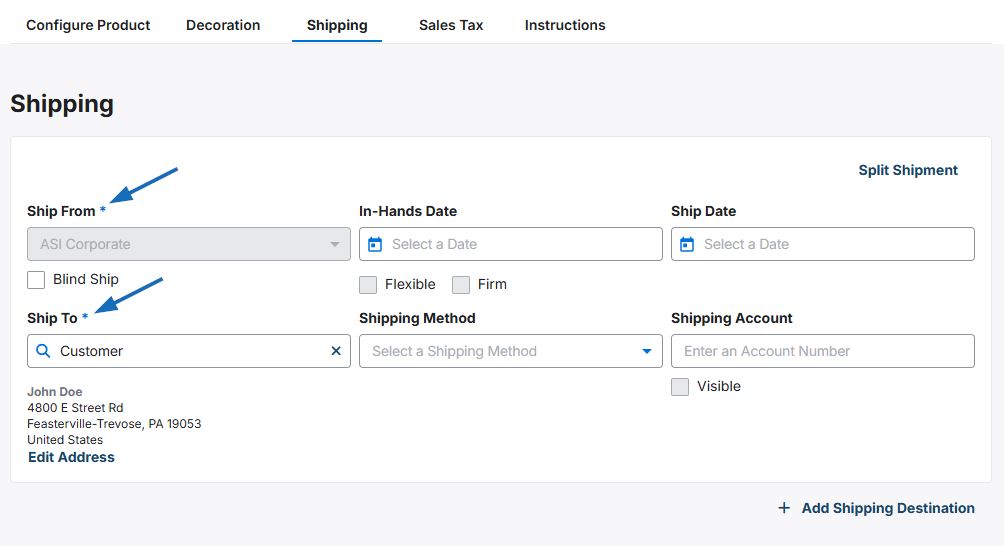
Shipping
The shipping path for this item will be displayed.
Add Shipping Destination
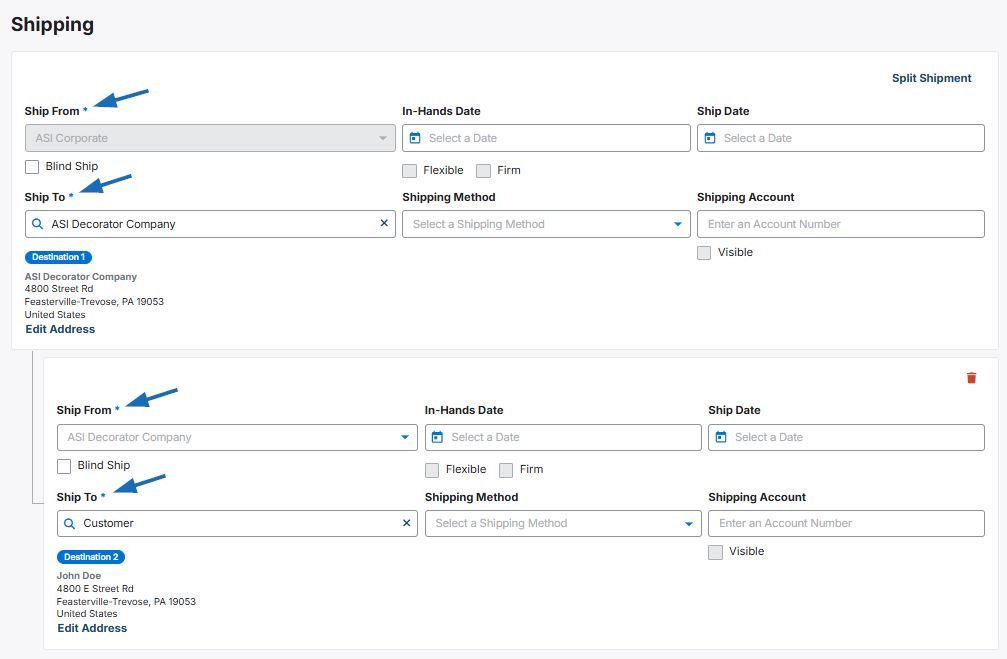
The "+ Add Shipping Destination" link enables you indicate another location in the shipping path. For example, if you needed to the send the order to the decorator company prior to sending it to your customer, you could do so by clicking on the "+ Add Shipping Destination" link.
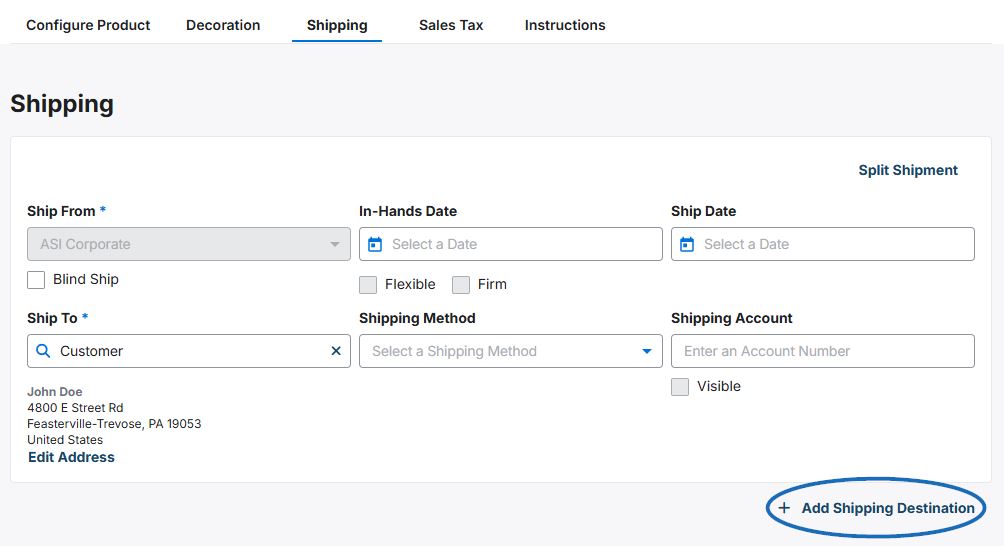
Then, update the Ship To fields on both paths.
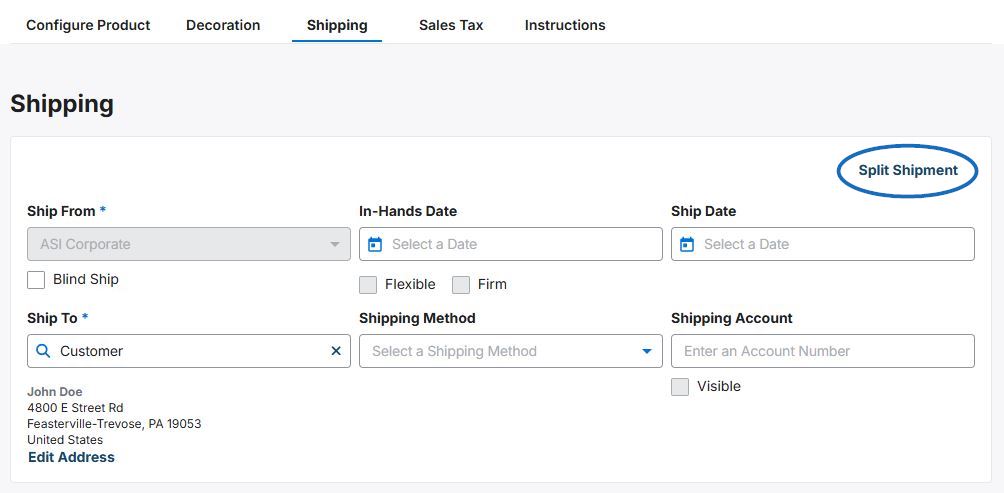
Split Shipping
Split shipping enables the order to be shipped to multiple addresses. For example, if you are working with a college and quoting products for multiple campuses, you could indicate the shipping path for each campus. To do this, click on the Split Shipment link.
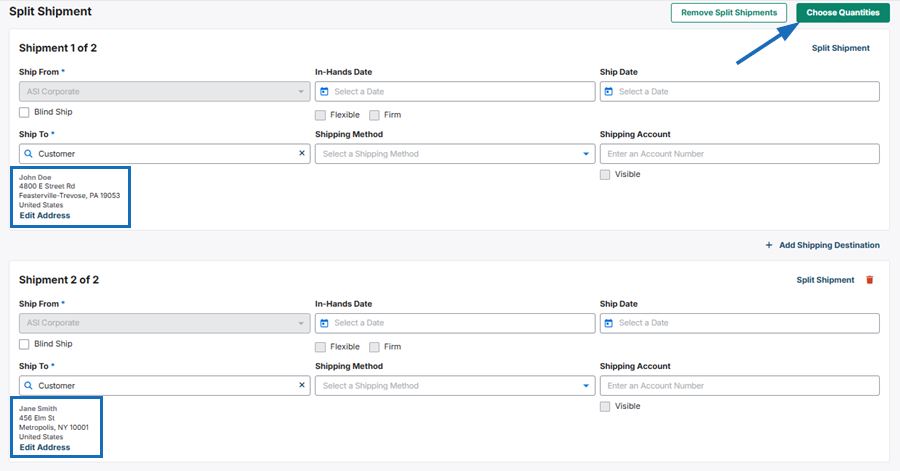
A second shipping path will be added and you can configure the additional location. Then, click on the Choose Quantities button.
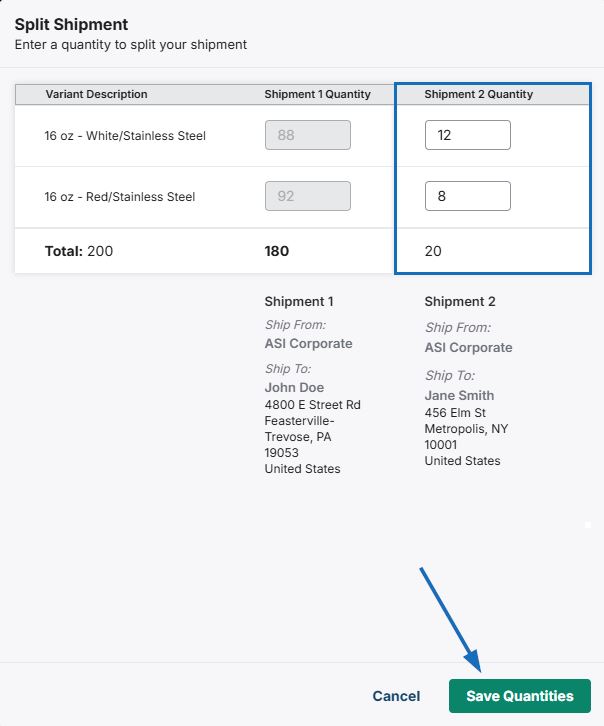
Enter the quantities for the second location and then click on the Save Quantities button.
Note: After establishing a split shipment, you will be returned to the Products & Pricing section, as the item will now be displayed in the individual shipments. You will need to click on the three-dot icon and select Edit to return to modifying the product information for the item within that shipment.
When you are finished updating shipping information, click on the Save button at the bottom.
Sales Tax
If the product fits into a tax category, use the drop-down to select a Tax Category. Additionally, you can apply a tax on the fly by clicking on the "+ Add Tax Rate" link and then configuring the tax information using the available boxes.
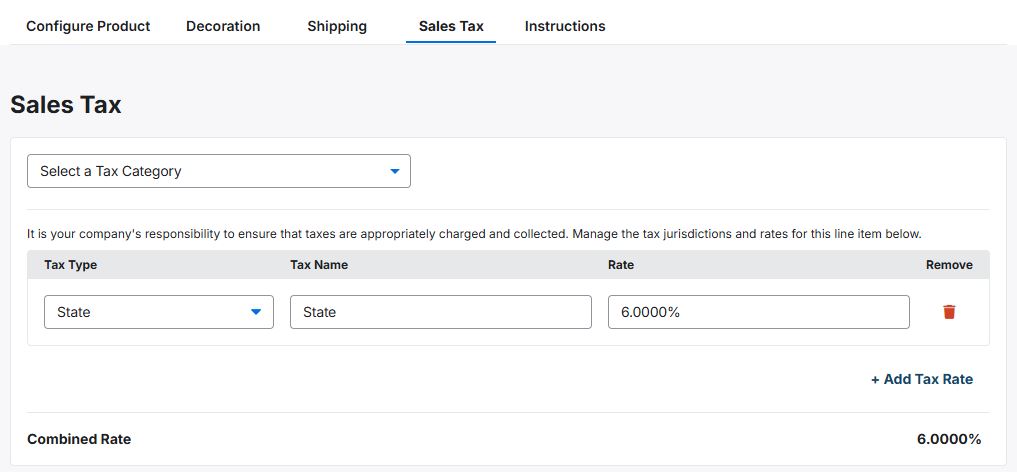
When you are finished updating sales tax information, click on the Save button at the bottom.
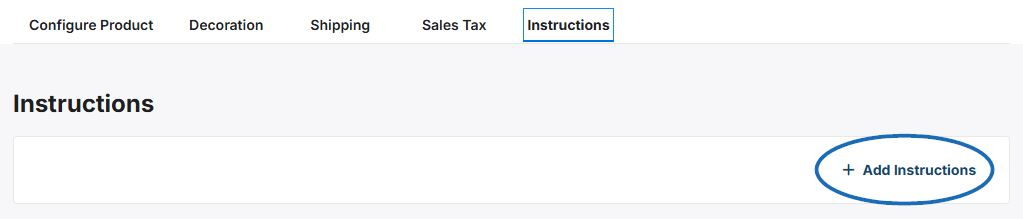
Instructions
In the Instructions tab, you are able to include specifications by clicking on the "+ Add Instructions" link.
Use the Type drop-down to select if the instructions should be included on customer or vendor facing documentation. Then, type the desired information in the Instructions box. You can include additional instructions by clicking on the "+ Add Instructions" link and configuring additional fields. To remove an instruction, click on garbage can icon.
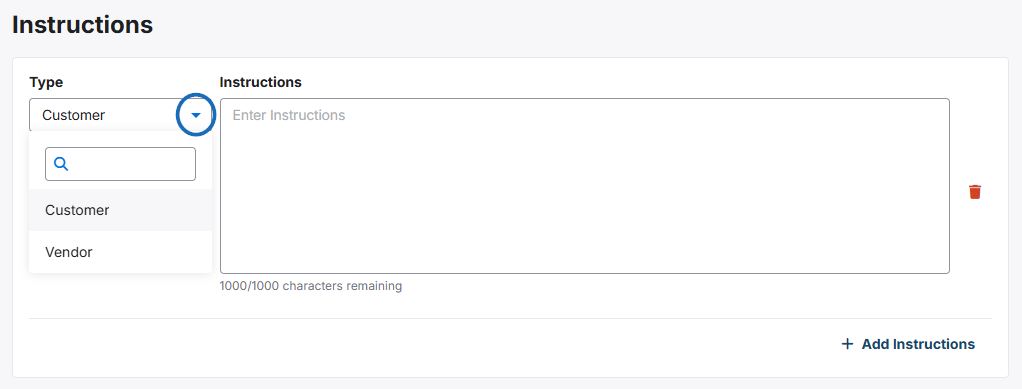
When you are finished adding and/or updating instructions, click on the Save button at the bottom.