

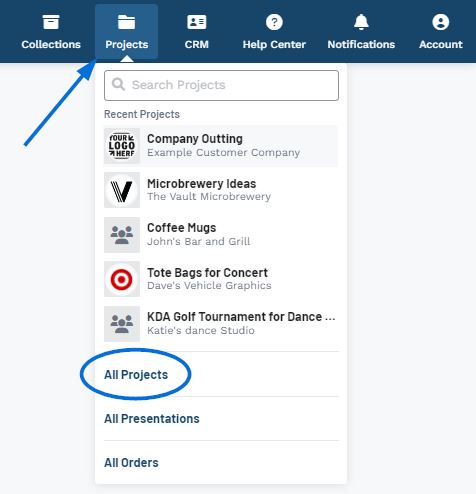
Projects are the central hub for all aspects of an event and contains all related information, such as the customer, presentations, and order documents, as well as the event type, important dates, budget, and number of attendees. To create a new project, click on the Projects option and then click on the All Projects link.
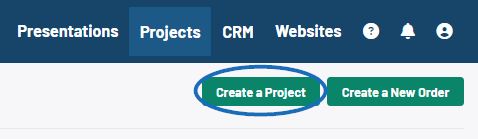
Next, click on the "Create Project" button.
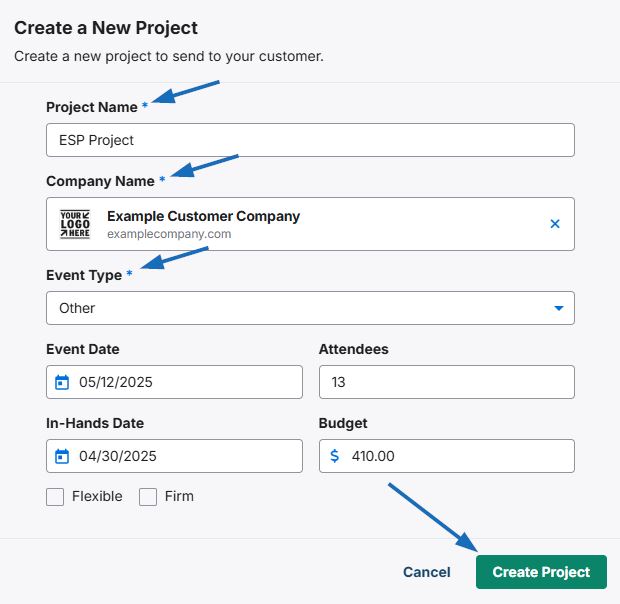
You can then begin to configure the project details.
The Project Name and Company Name are required. Type the project name and then select the Company. If this project will be assigned to an existing company in your CRM, begin typing in the Company Name box. As you type, companies which match the entered text will appear and you can click on the company's name to select them.
If the company is not listed in your CRM, type their name and then click on the Create New Company option at the bottom of the available options. When you select to create a new company, a new field for their website and an Add Contact button will become available. Use the Website box to type the company's website address and click on the Search Brand button to source the company's logo, icon, and primary brand color. After you have entered information in all the required fields, the +Add Contact button at the bottom will become available.
A contact is the actual person at the company. Clicking on the Add Contact button will open a new window where you can enter the contact's first and last name, as well as their email, role, phone, and address. The role of the contact plays a key part in the order process so if this contact is responsible for any of the roles listed, check the box for the appropriate option. Please note that one contact can be responsible for one, two or all three roles. When you are finished, click on the Create Presentation button.
Watch a quick video on how to configure a new presentation with a new company and contact.
Then, fill in the additional five fields of event type, event date, attendees, in-hands date, and budget if you are able. It is important to keep in mind that all information entered on this screen can be updated in the project if needed. When you are finished, click on the Create Project button.
The newly created project will open with a success message in the lower right corner.
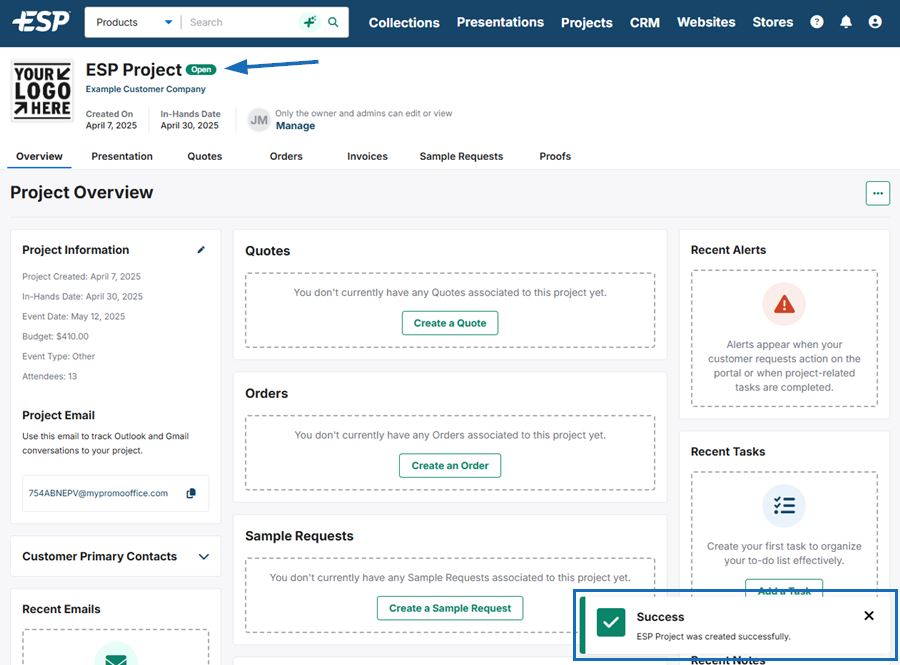
You can now add products to the presentation or create order documentation. The project will be available via the Projects option on the main toolbar, either in the Recent Projects listing or by clicking on All Projects option.