You can create a virtual sample within an ESP+ Presentation or on the Product Detail Page. To get to the Edit Product section of the presentation, click on the "Presentations" tab from the main toolbar and select your presentation. Scroll to the Edit Products area and click on the item for which you would like to create a Virtual Sample.
See how to access the Edit Product section
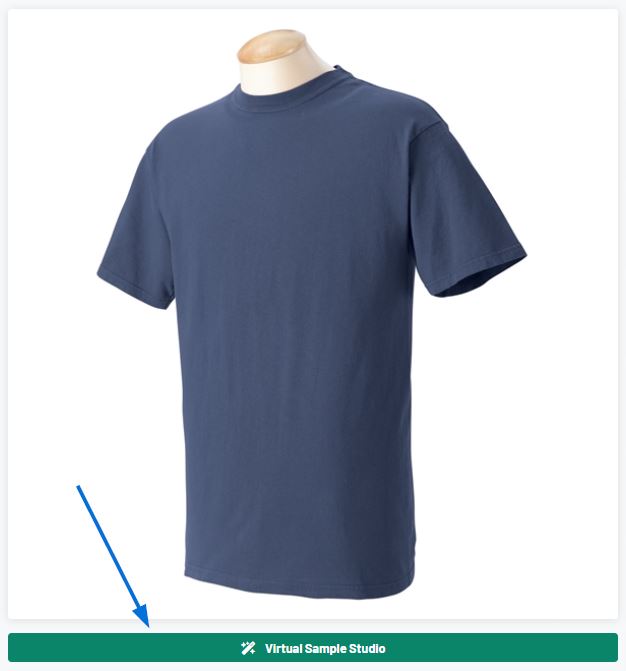
On the Edit Product Details page, click on the "Virtual Sample Studio" below the product image.
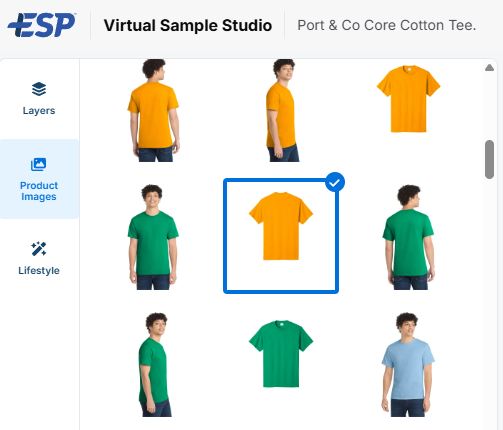
The Virtual Sample Studio window will open. In this area, click on the Product Images tab to select the image you want to use for you virtual sample.
Next, click on the Layers tab to begin designing your virtual sample.
In the layers area you can upload a new image, add text, or add artwork.
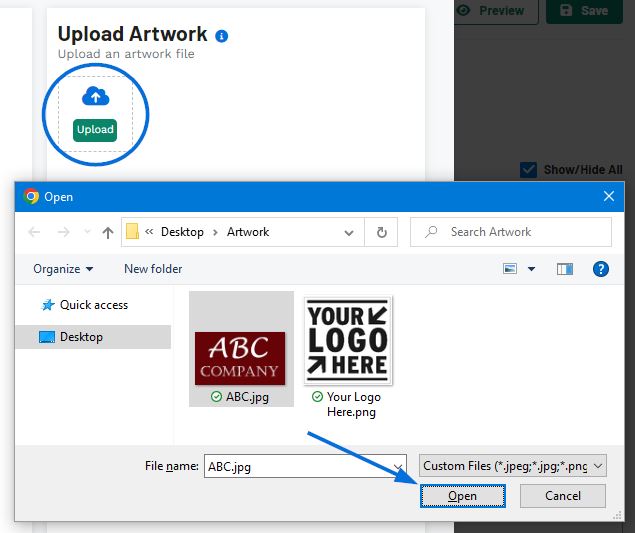
In the Add Artwork area, you can: Select existing artwork from the asset library, use saved artwork from a customer's CRM, use a saved design from a previous virtual sample, or search brand logos from the web by searching the company name or website.
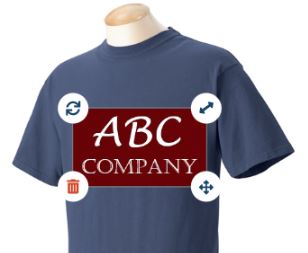
The uploaded artwork will be added on top of the product image. On the image itself, there are editing options on each corner:
- Upper Left Corner: Two curved arrows in a circle indicate the option to rotate the uploaded artwork on the image. Click on this icon and drag the mouse to rotate the uploaded artwork.
- Upper Right Corner: One arrow with points on each end indicate the option to resize the uploaded artwork on the image. Click on this icon and drag the mouse to resize the uploaded artwork.
- Lower Left Corner: Trash can icon indicates the ability to remove the uploaded artwork from the image.
- Lower Right Corner: Arrows pointing in four directions indicate the ability to relocate the uploaded artwork on the image. click on this icon and drag the mouse to move the uploaded artwork to a new location on the image.
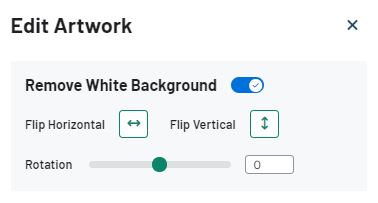
In the Edit Artwork section, there are options for updating the uploaded artwork. If the uploaded artwork is on a white background, use the slider to remove all white in the image. You can also flip the artwork horizontally or vertically.
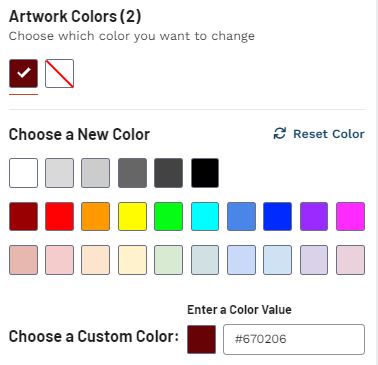
If the uploaded artwork contains less than 12 individual colors, you will be able to change the colors within the artwork. When the white background is removed from the artwork, the color swatch will be displayed with a diagonal red line.
To edit a color, click on it and then use the options in the Choose a New Color section to select the new color. If you have a specific color value, you can enter the hex code for that shade in the Choose a Custom Color box.
When you are finished editing the artwork, you can create a Lifestyle image to place the virtual sample in countless settings using the AI image generator.
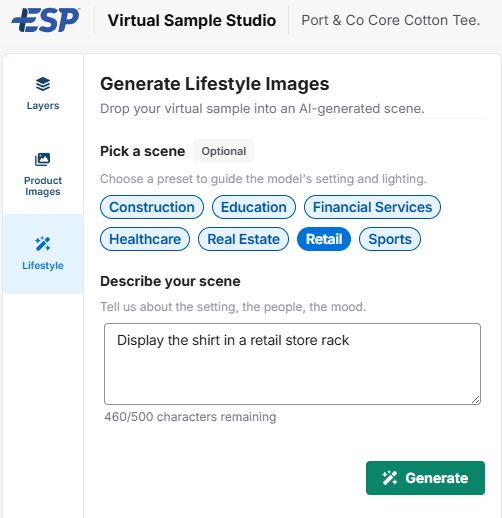
An image will be generated using your selections and prompts. You can continue to refine the image by adding new prompts until you are satisfied with the lifestyle image.
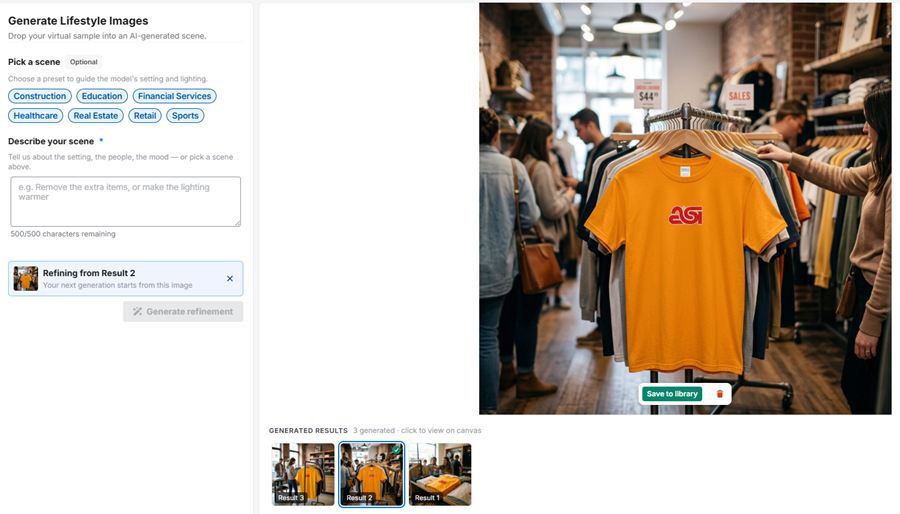
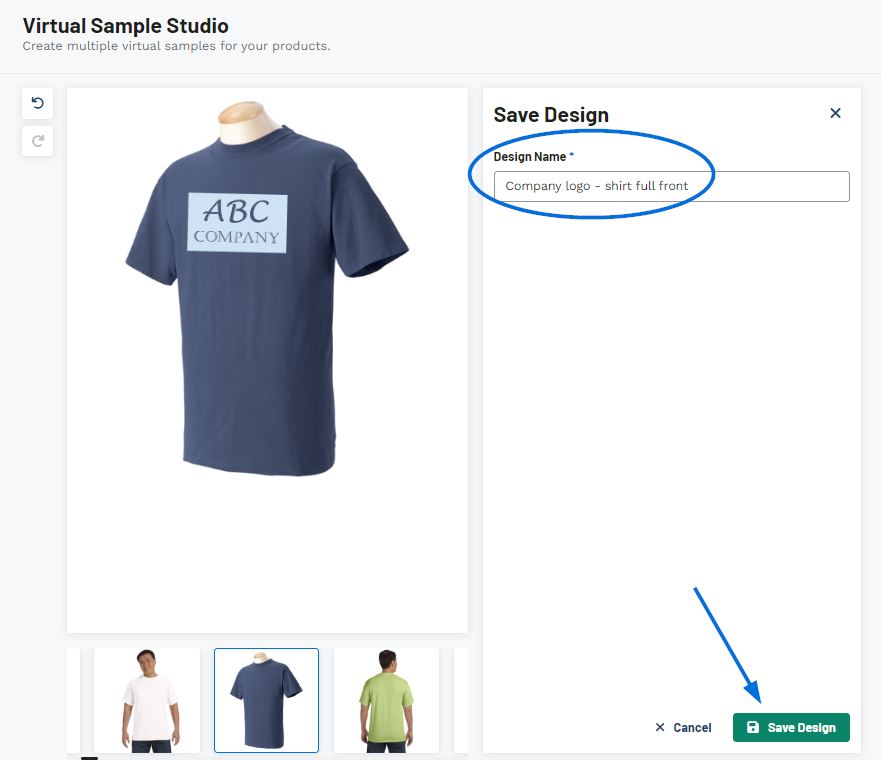
To save the lifestyle image to the asset library, click on the "Save to Library" button. To save the virtual sample image, click on the "Save Design" button. Enter a name for this design and the customer in the available boxes and then click on the "Save to CRM" button. The design will be saved in the customer's CRM.