


With the ESP+ QuickBooks Online Integration, you're able to easily create transactions between your billing, invoice, and purchase order data to your ESP+ CRM.
Establish Integration
After logging into ESP+, click on Account from the main toolbar and select Settings.
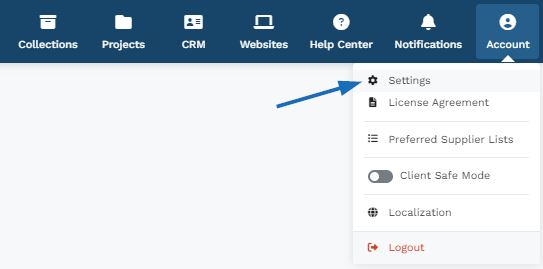
From the options on the left, click on Account Integrations from the Integrations Admin section.
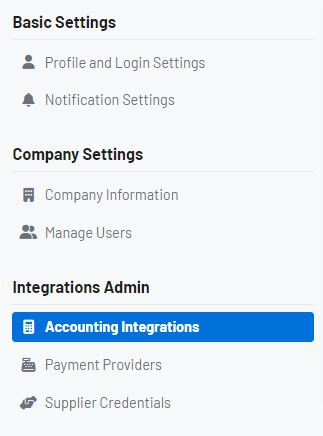
ESP+ can integrate with Intuit® QuickBooks Online and/or ASI SmartBooks.

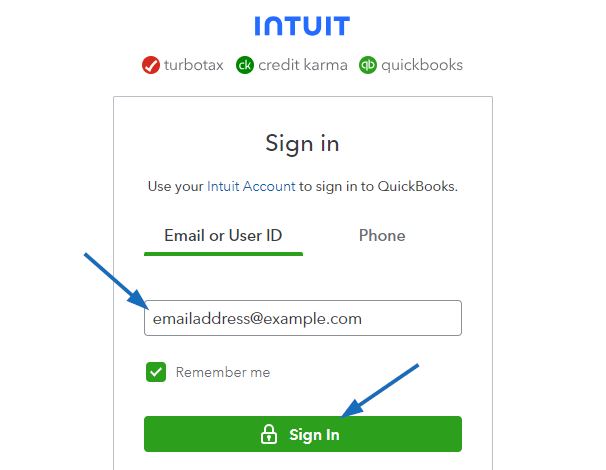
A window will open where you can sign into your QuickBooks account.
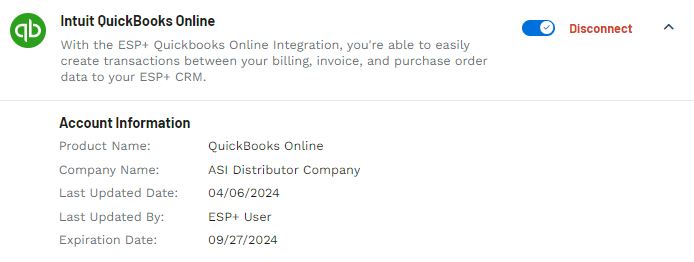
Your QuickBooks Online account will now be connected to ESP+.
Configure Integration Information
After logging into ESP+, click on Account from the main toolbar and select Settings.
From the options on the left, click on Account Integrations from the Integrations Admin section.
Account Information
After integration is complete, the Intuit QuickBooks Online will display with an option to Disconnect and Account Integration information.
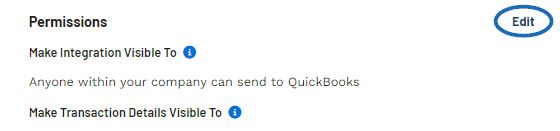
Permissions
In the Permissions section, select the level of visibility using the Edit link.
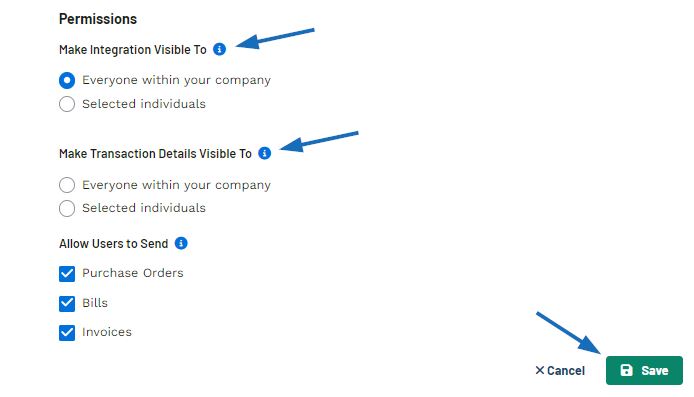
Select whether to make the QuickBook Integration and transaction details visible to all users within your company or select specific individuals.
You can also use the checkboxes to select which documents can be sent by users.
When you are finished, click on Save.
QuickBooks Accounts and Settings
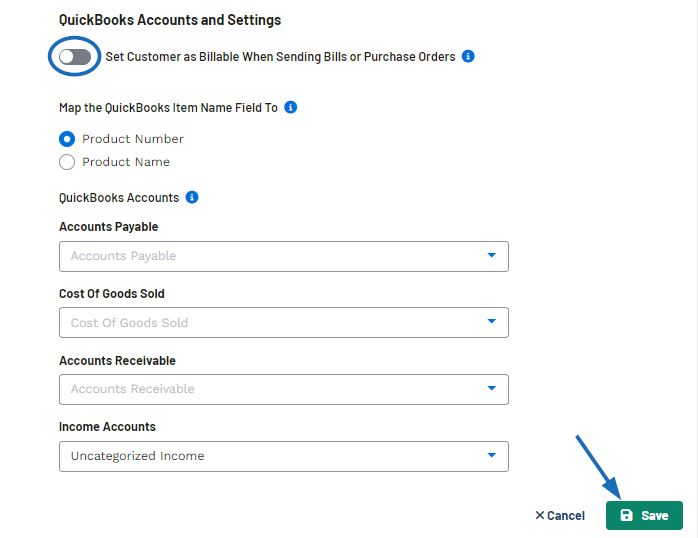
In this section, select the options for the integrated account. The first slider, "Set Customer as Billable When Sending Bills or Purchase Orders" enables you to display a Billable Expense Column in QuickBooks Online that can be invoiced to the Customer on the Bill or Purchase Order. If you plan on sending the Invoice to QuickBooks then this selection needs to be set to off.
The next option, "Map the QuickBooks Item Name Field To" is where you can choose whether the Product Number or Product Name will be referenced as the QuickBooks Product Service Name value when sending a purchase order, bill, or invoice.
Use the dropdowns to map specific fields to your fields in QuickBooks.
When you are finished, click on the Save button.
Link ESP+ Companies to QuickBooks
This section enables you to link the companies within your ESP+ CRM to your QuickBooks Online account.
Click on the Edit link for the member type.
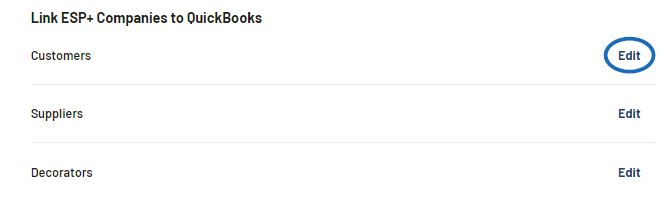
Locate the company in ESP+ and then use the available field to link to the customer in QuickBooks.
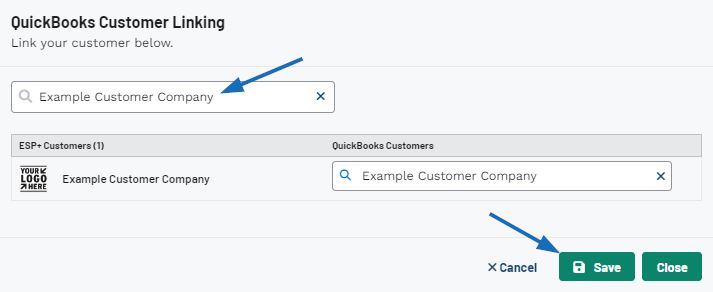
When you are finished, click on Save.
 Français
 Español