A quote provides the customer with an estimated cost for all goods and services. Within ESP+, there are several options for initiating a quote.
How would you like to start your quote?
- From the Product Detail Page
- From a Customer Quote Request
- From the Presentation
- Without a Presentation
- With Custom Products
Create the Quote from the Product Detail Page
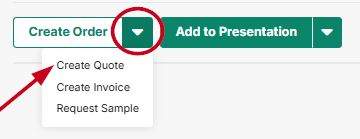
To create a quote from the product detail page, click the down arrow next to "Create Order", then click on "Create Quote".
You can create the quote with or without creating a project by selecting a project to add the quote to, or selecting "Skip for now".
If you choose to create the quote without a project, select the customer or click on "Create Customer" and enter the customer details.
After selecting or creating the customer, configure the quote details and click on "Create Quote".
Allow the Customer to Submit a Quote Request from the Client Portal
When a customer receives an email or link to their presentation, they are essentially accessing a personalized portal for all customer facing information related to the promotional event. The portal is interactive and customers can provide feedback and/or request items. When the customer accesses their portal, they will be brought to a landing page which will contain the project details and available items.
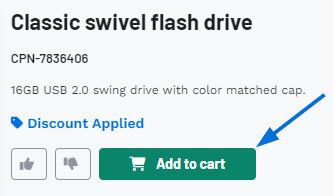
The client portal is where your customer can view the presentation information. They can click on a product to view all the item's details based on the configuration from the distributor. From the product page, customers can indicate if they dislike this item or add it to the cart using the available buttons.
If the customer chooses to the Request Information button to add products to the cart, the level in which they are able to configure the product variants (colors, sizes, materials, etc.) will vary based on whether the distributor has enabled those options in the Sharing Options section of the Presentation Settings.
See how the Sharing Options impacts the Request Information window
If the option to configure the product variants is enabled, our customer can select their desired variants prior to adding this item to their cart using the available dropdowns. If they need multiple colors (and/or sizes, shapes, materials, etc.) for the same product, each selected configuration creates a line item and clears the dropdowns, so customers can keep adding what they need. If available, customers can also include imprinting information, enter comments regarding customization, and upload files. They can upload images, as well as other files types like .docx or .csv. For example, if a customer was ordering baseball shirts and needed them personalized, they could upload both their team logo and the list of names and numbers for personalization all through this window.
Watch customer configure product
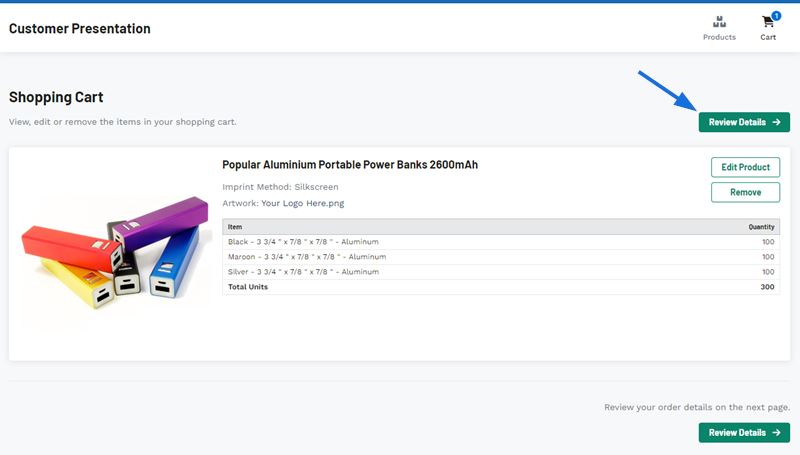
The customer can continue to configure and add products to their cart. When they are ready to submit their quote request, they can click on the Review Details button.
In the Quote details area, the customer must provide information in the Point of Contact section. The Name, Email, and Phone fields are all required. Any information the customer provides in the additional fields of Quote Details, Shipping Information, and Billing Address will be included on the quote.
The customer can also use the Upload Additional Files section to upload more images or files. After the customer has finished entering the pertinent information, they can click on the Send Quote Request button to submit a quote.
Add/Import Products from a Presentation to a Quote
Add From a Presentation
To add items to a quote from an existing presentation, click on the Presentations from the main toolbar.

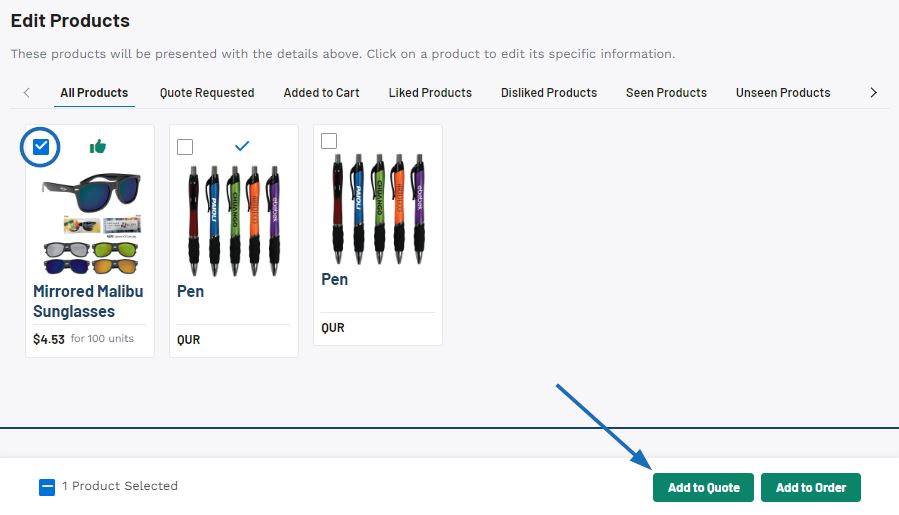
All items within a presentation will be displayed in the Edit Products area of the Presentation tab. To add products directly from a presentation to a quote, use the checkbox on the item listing to select the product(s). A toolbar will display at the bottom. Click on the Add button, then Add to Quote button from this toolbar.
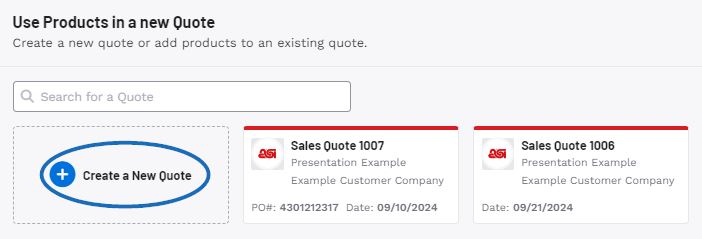
If there are already quotes available for this project, you will be able to click on the tile for that quote. To begin a new quote, select the Create a New Quote option.
The Create a New Quote for Project window will open. While the Quote Date, Sales Person, and Order Contact are required, it is recommended that you provide as much information as possible.
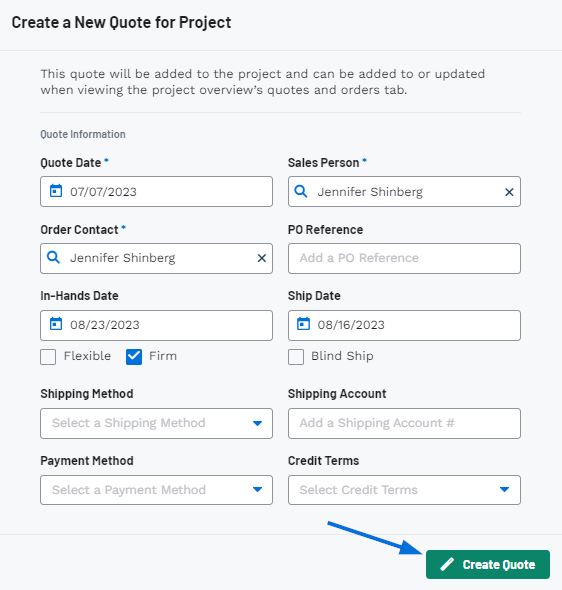
When you are finished entering information, click on the Create Quote button.
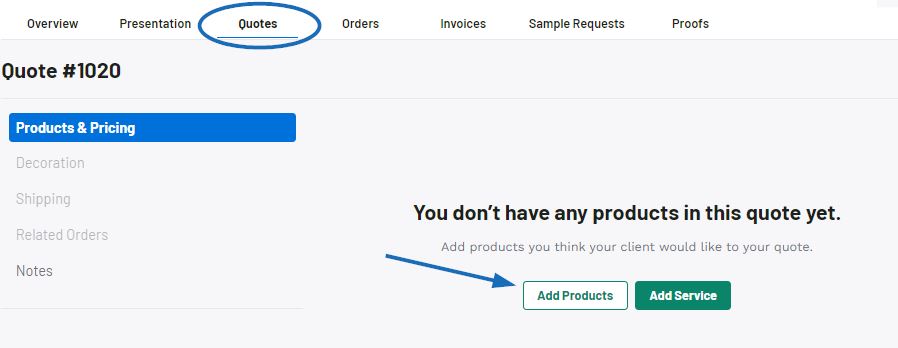
After saving, you will be directed to the Quotes area where you can begin to configure the products for the quote.
Import from a Presentation
After creating a new quote in the Overview or Quotes section of the project, items can be imported from a presentation by opening the quote details and clicking on the Add Products button.
The Add Products window will open. Click on Presentation from the options on the left, then use the drop-down to locate the presentation. Click on the presentation listing. Use the checkbox to select the product(s) you would like to include in the quote. When you are finished, click on the "Add Products" button.
Create a New Project and Quote
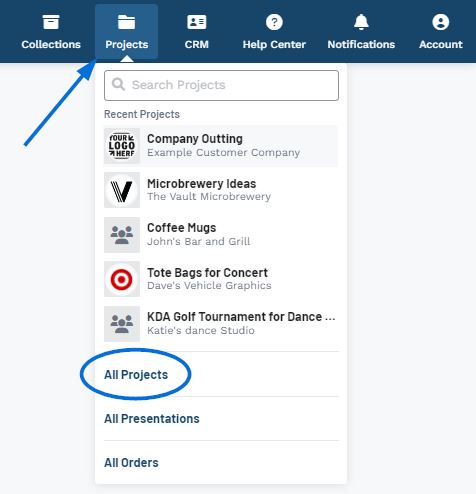
To create a quote without a presentation, you are able to configure a project and create a new quote. To do this, click on Projects from the main toolbar and then select Projects from the available menu.
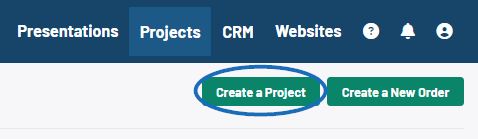
In the Projects area, click on the Create a Project button.
Note:To create a quote without a project, click on "Skip for Now".
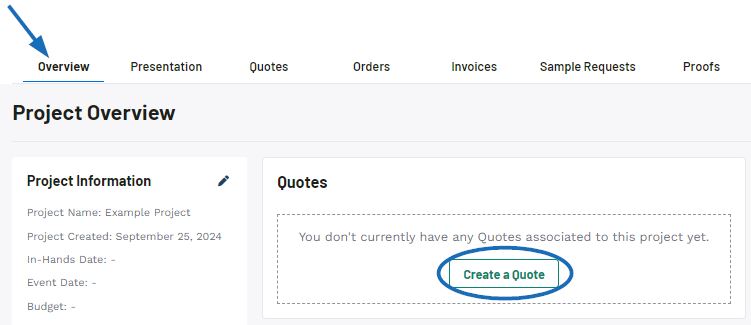
Configure the Project details. Project Name, Company Name, and Event Type are required. When you are finished entering information, click on Create Project. The Project will open. At this point, you can either:
- Click on the Create a Quote button from the Overview section.
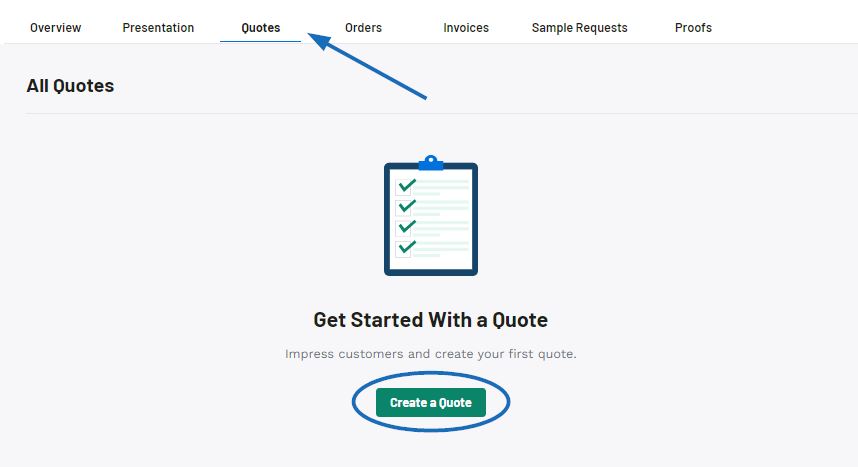
- Go to the Quotes section and click on the Create a Quote button.
The Create a New Quote for Project window will open. While the Quote Date, Sales Person, and Order Contact are required, it is recommended that you provide as much information as possible.
When you are finished entering information, click on the Create Quote button.
After saving, you will be directed to the Quotes area where you can begin to add products and services to the quote.
It is important to note that multiple quotes can be created for a single project.
With Custom Products
Existing Custom Product
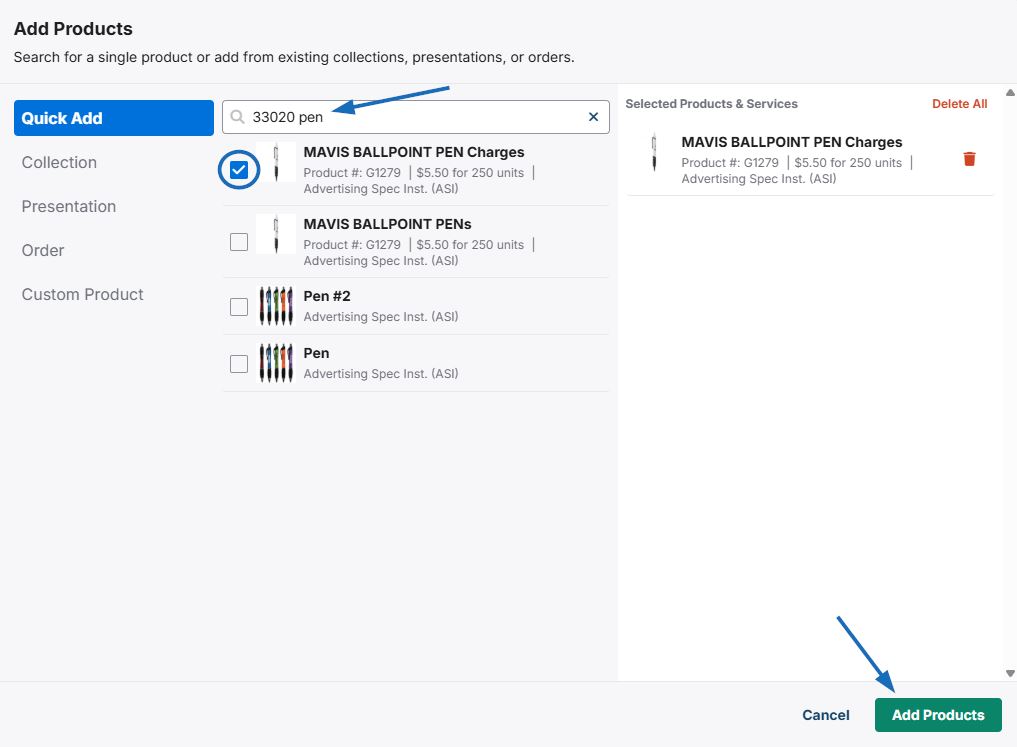
In the Add Products window, click on Quick Add and enter your company's ASI Number in the Search for a product field. If you have a large amount of custom products, you can also include a keyword.
Select the product(s) you would like to include on the order document. The item(s) will listed in the Selected Products & Services area. When you are finished, click on the Add Products button.
The product will now be added to the order documentation.
New Custom Product
There are two key aspects to keep in mind when creating custom products during the order creation process:
- You will need to add the supplier information from your CRM. If the supplier is not currently listed in your CRM, you will need to add them prior to creating the custom product.
- Custom products created for order documentation will not be uploaded to the ESP+ database.
How do I add a non-ASI vendor company as a supplier in my CRM?
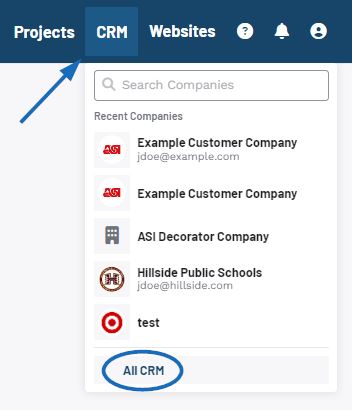
To add your company or a non-ASI vendor as a supplier in CRM, click on the CRM option from the main toolbar and select "All CRM".
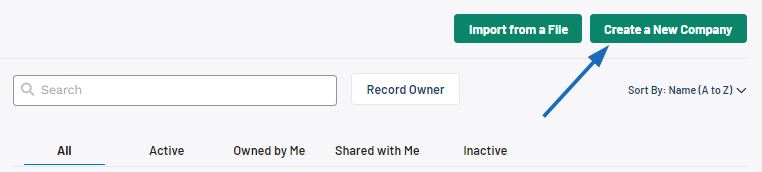
Then, click on the Create a New Company button.
When the Create a New Company window appears, select "Supplier" as the Company Type and then enter the name of your company or the non-ASI vendor in the Company Name section. The Company Type, Company Name, and Primary Contact's Name are required, but it is recommended to provide as much information as possible.
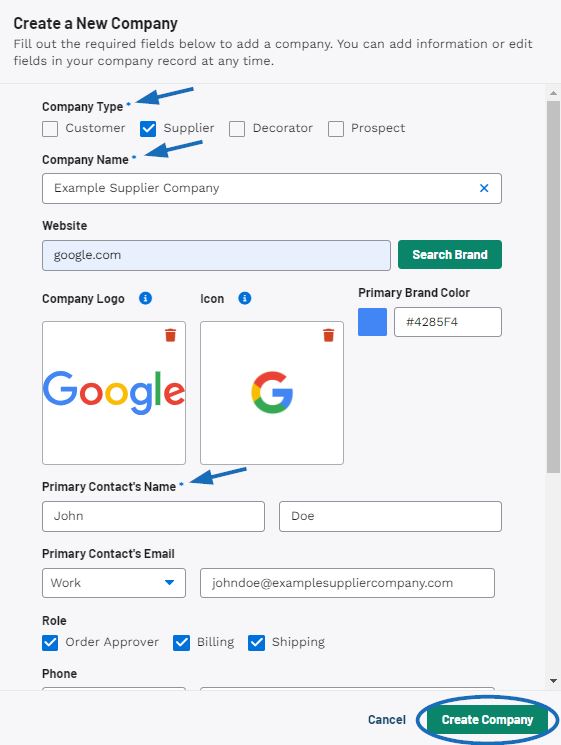
The Company Type, Company Name, and Primary Contact Name are required, but the more information, the better so it is recommended to provide as much information as possible. When you are finished entering information, click on the Create Company button.
Watch a short tutorial on how to create a new company
The non-ASI vendor will now be available as a supplier in your CRM and you can use this company as the vendor when creating a custom product.
In the Add Products window, click on Custom Products. The Custom Product section enables you to configure the details for the product. While the Product Name and Supplier are required, it is recommended that you include as much information as possible. Once you have finished entering information, click on the "Add Custom Product" button.
Watch a short tutorial on how to configure a custom product
The product will be moved into the Selected Products & Services section and the custom product form will be reset so you can continue to add more items if needed. You will be able to fully configure the product information, including uploading images, editing pricing, and listing additional charges after the item has been added to the order document. When you are finished adding products, click on the "Add Products" button at the bottom.
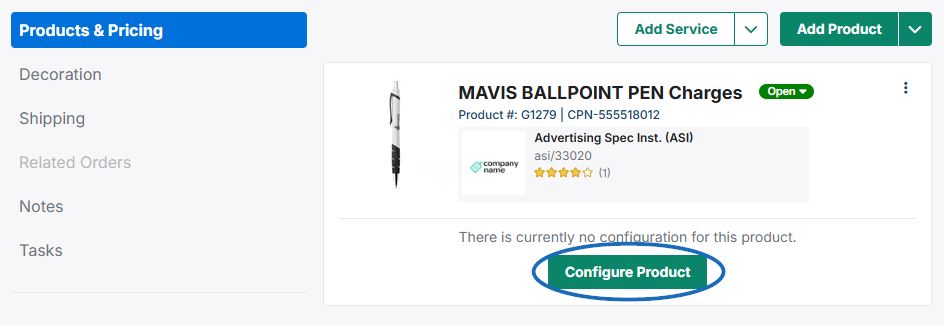
After the item has been added to the order document, it will be listed in the Products & Pricing section. Click on the Configure Product button to modify the details.